.svg)
How to Save Product Research Results? | FREE Amazon FBA Course | Module 10
Download Amazon Seller Guide
This guide will help you get started, understand the basics of Amazon selling, and explain in simple words how it all works.

Hi everyone! Welcome back to our Seller Assistant Academy.
In this module, we will together learn how to quickly save your product research results to Google Sheets.
Let’s go!
Why save product research data?
When you research products on Amazon, you review dozens of product metrics. You can’t remember all of them. You may need to save supplier links, sort products by specific parameters, do additional calculations, analyze what you researched, and more.
In other words, you may need to retrieve and come back to your research results, that’s why you need to quickly save a lot of data to have them at hand at any time.

Many Amazon sellers involved in product sourcing do that with Google Sheets, a popular data storage and processing tool. If you need to store and process bulk data and quickly share them, Google Sheets is a good choice.
How to quickly export data to Google Sheets with Seller Assistant?
After you find a potentially profitable product and research it with Seller Assistant, you can export all these data to Google Sheets with just a single click. You only need to click a Save button in Seller Assistant.

With Seller Assistant you can save over 100 product parameters and values, select those you need, and configure your spreadsheet as you like.
To export your product sourcing results to Google Sheets using Seller Assistant, you must connect your Google Sheets account, set up the export settings, and save your data. By doing so, you can easily access and collaborate on your data, and process it further for future reference.
How to connect Google Sheets to Seller Assistant?
To export your Seller Assistant product sourcing data to Google Sheets, you need to connect your Google Sheets account to the extension. Here are the steps to do so.
- Create a new spreadsheet in your Google Drive that meets the following criteria:

- You must have Editor permission if it's a shared spreadsheet;
- The sheet must not contain merged or protected cells;
- The spreadsheet must have available free rows.
2. Go to the account settings of Seller Assistant and navigate to the Google Sheets section.
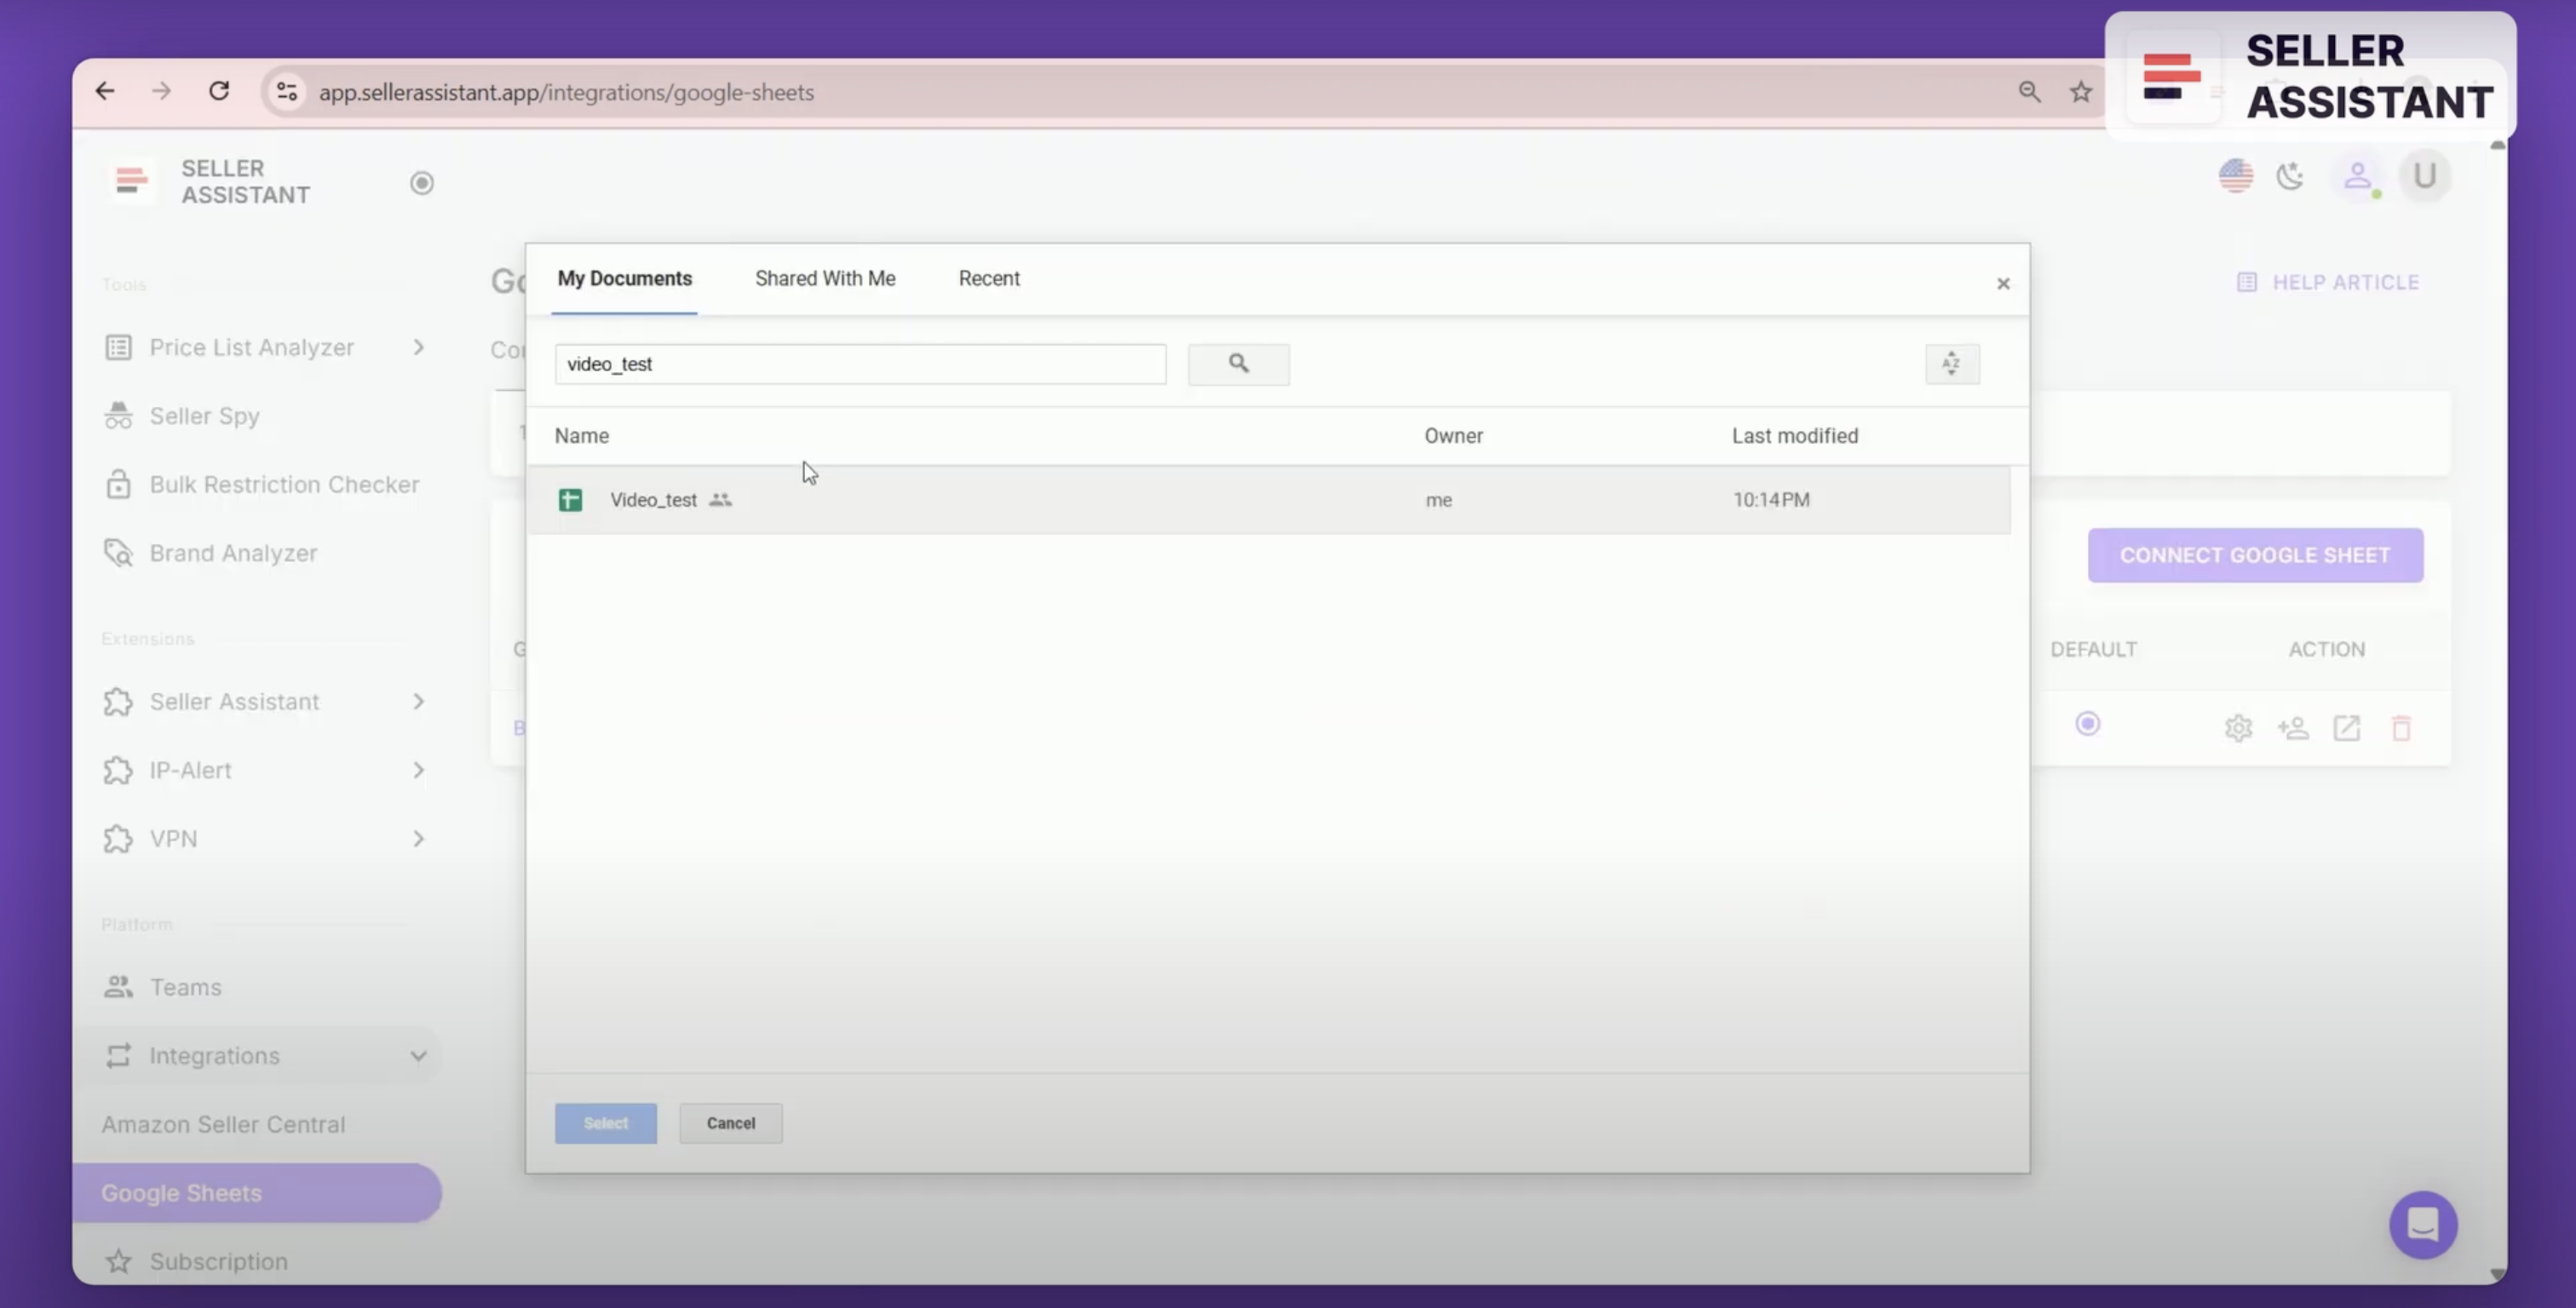
3. Click the Connect button and select your Google account.

4. Choose the specific Google account you want to integrate with Seller Assistant.
5. Select the specific sheet in your Google Drive where you want to export the data from the available options. Now you are ready to seamlessly export your data.
How to set up export to Google Sheets?
After integrating your Google Sheets, you will need to configure it to export data from Seller Assistant. You can do it in several easy steps.
- Go to the Google Sheets section in your Seller Assistant account settings.
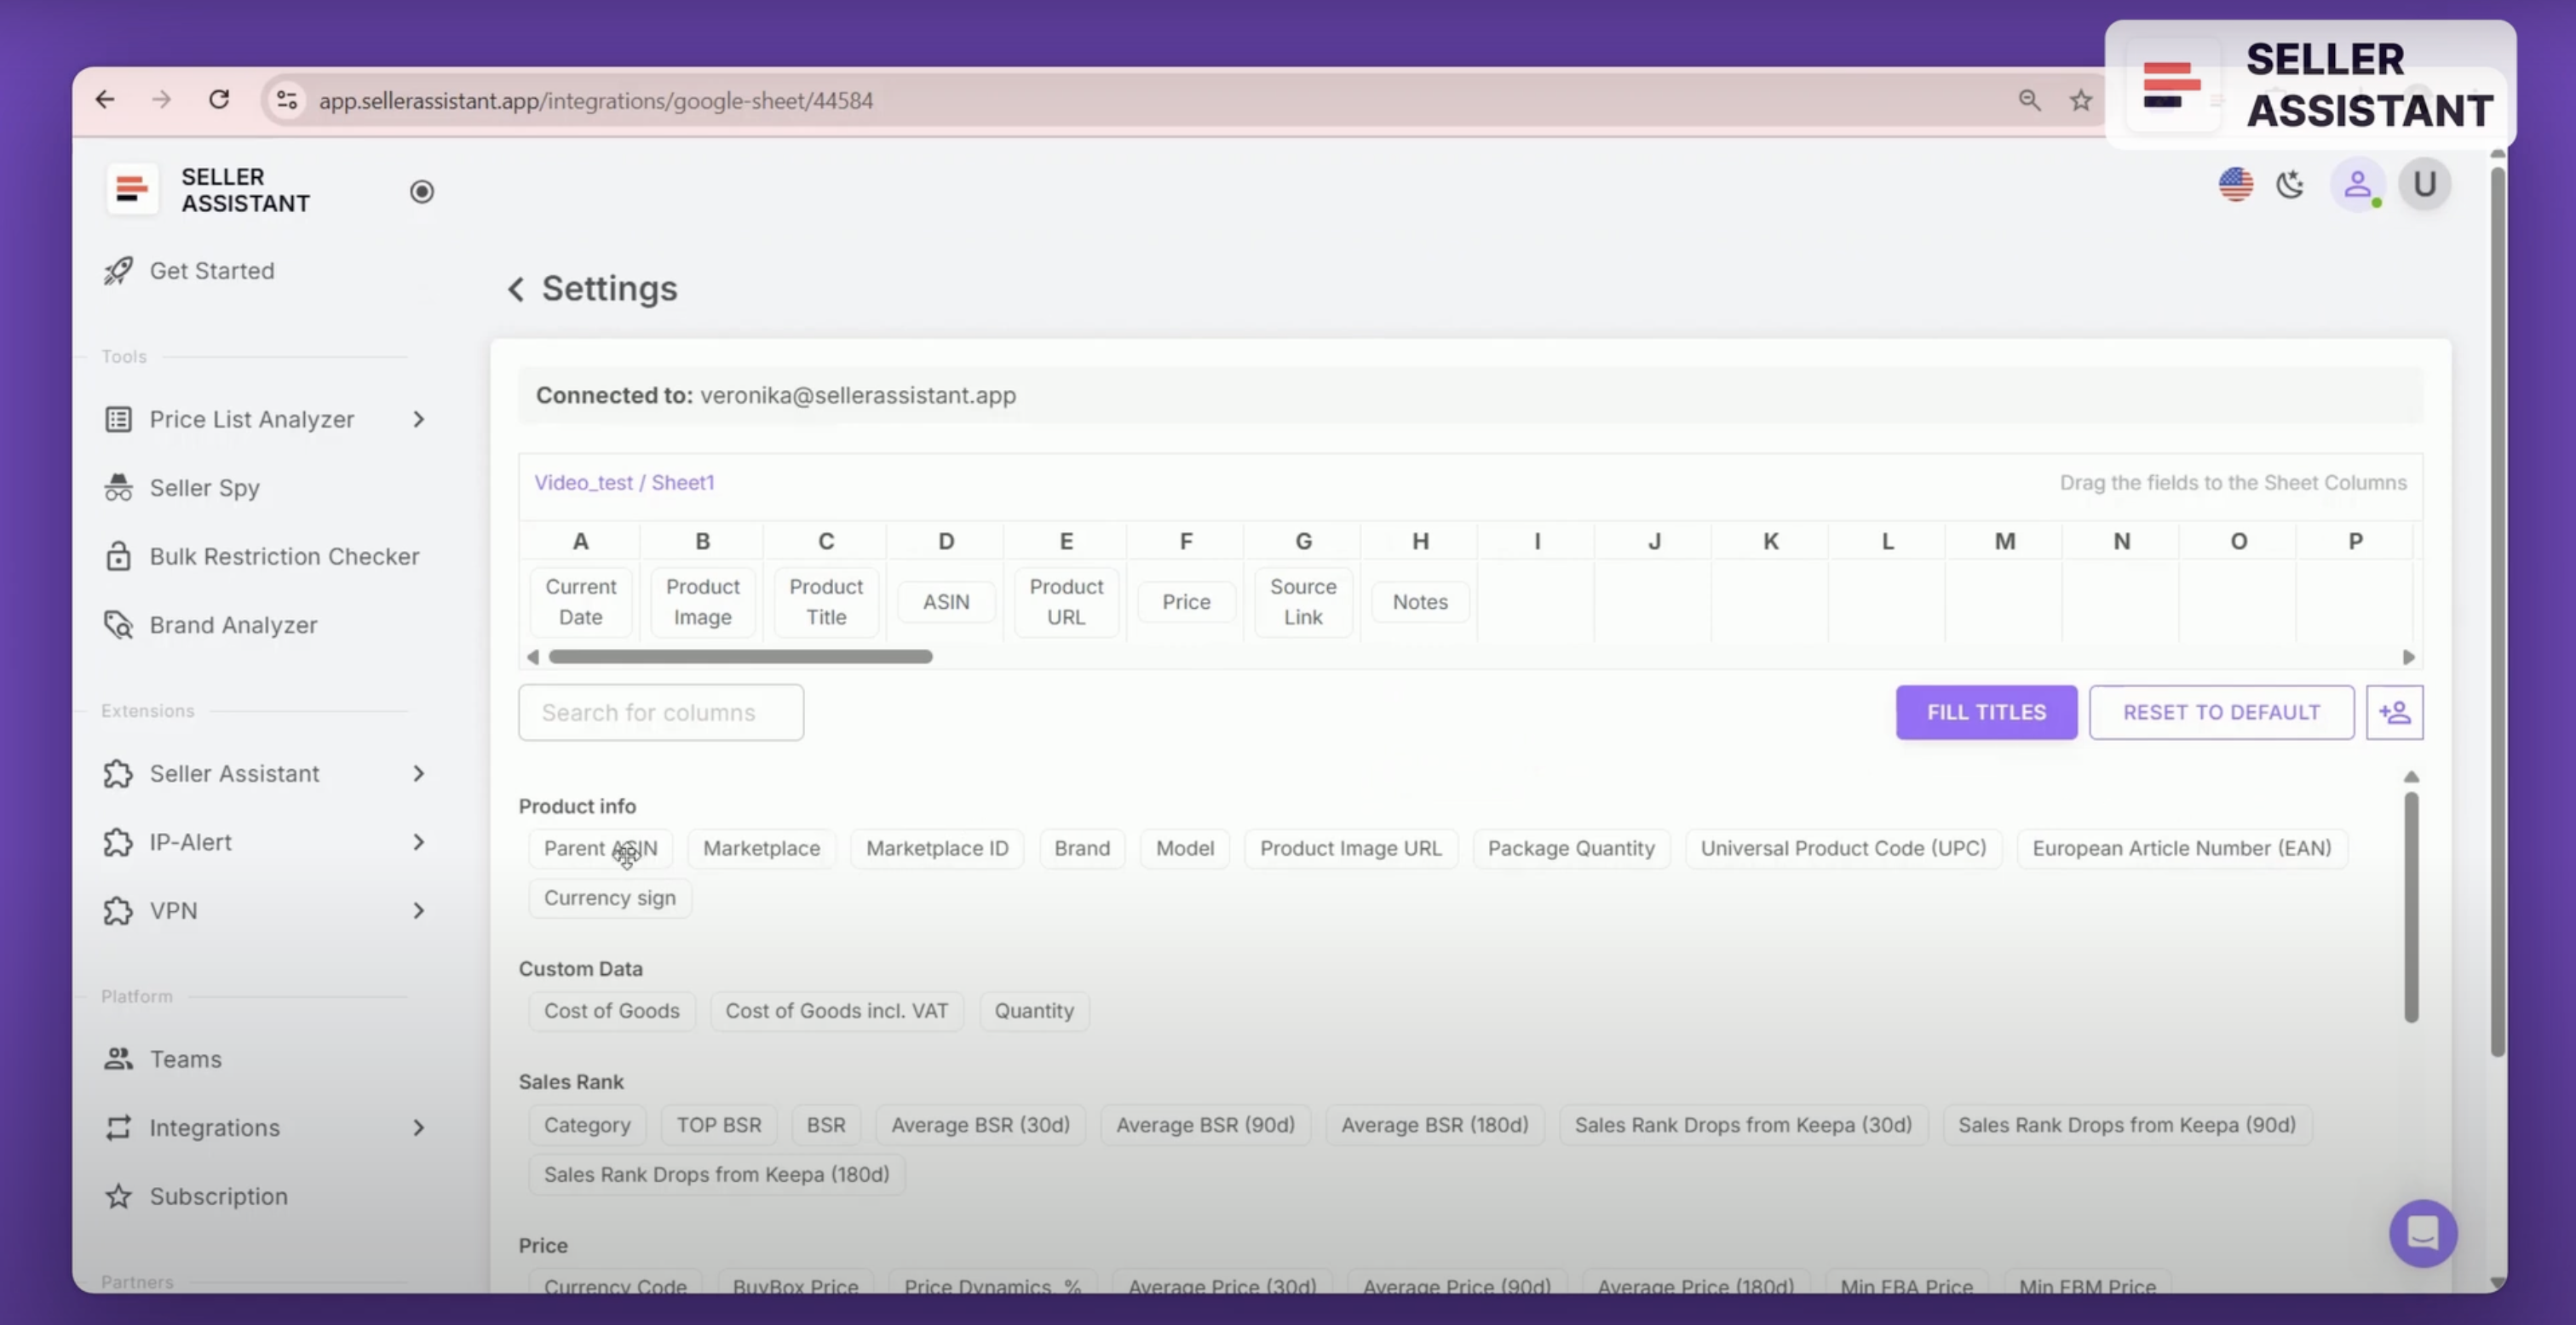
2. Simply drag and drop the required variables into the appropriate table cells within the Google Sheets interface.
3. Select from more than 100 available variables that can be exported. If necessary, use the filter function to quickly find the products and metrics you need.
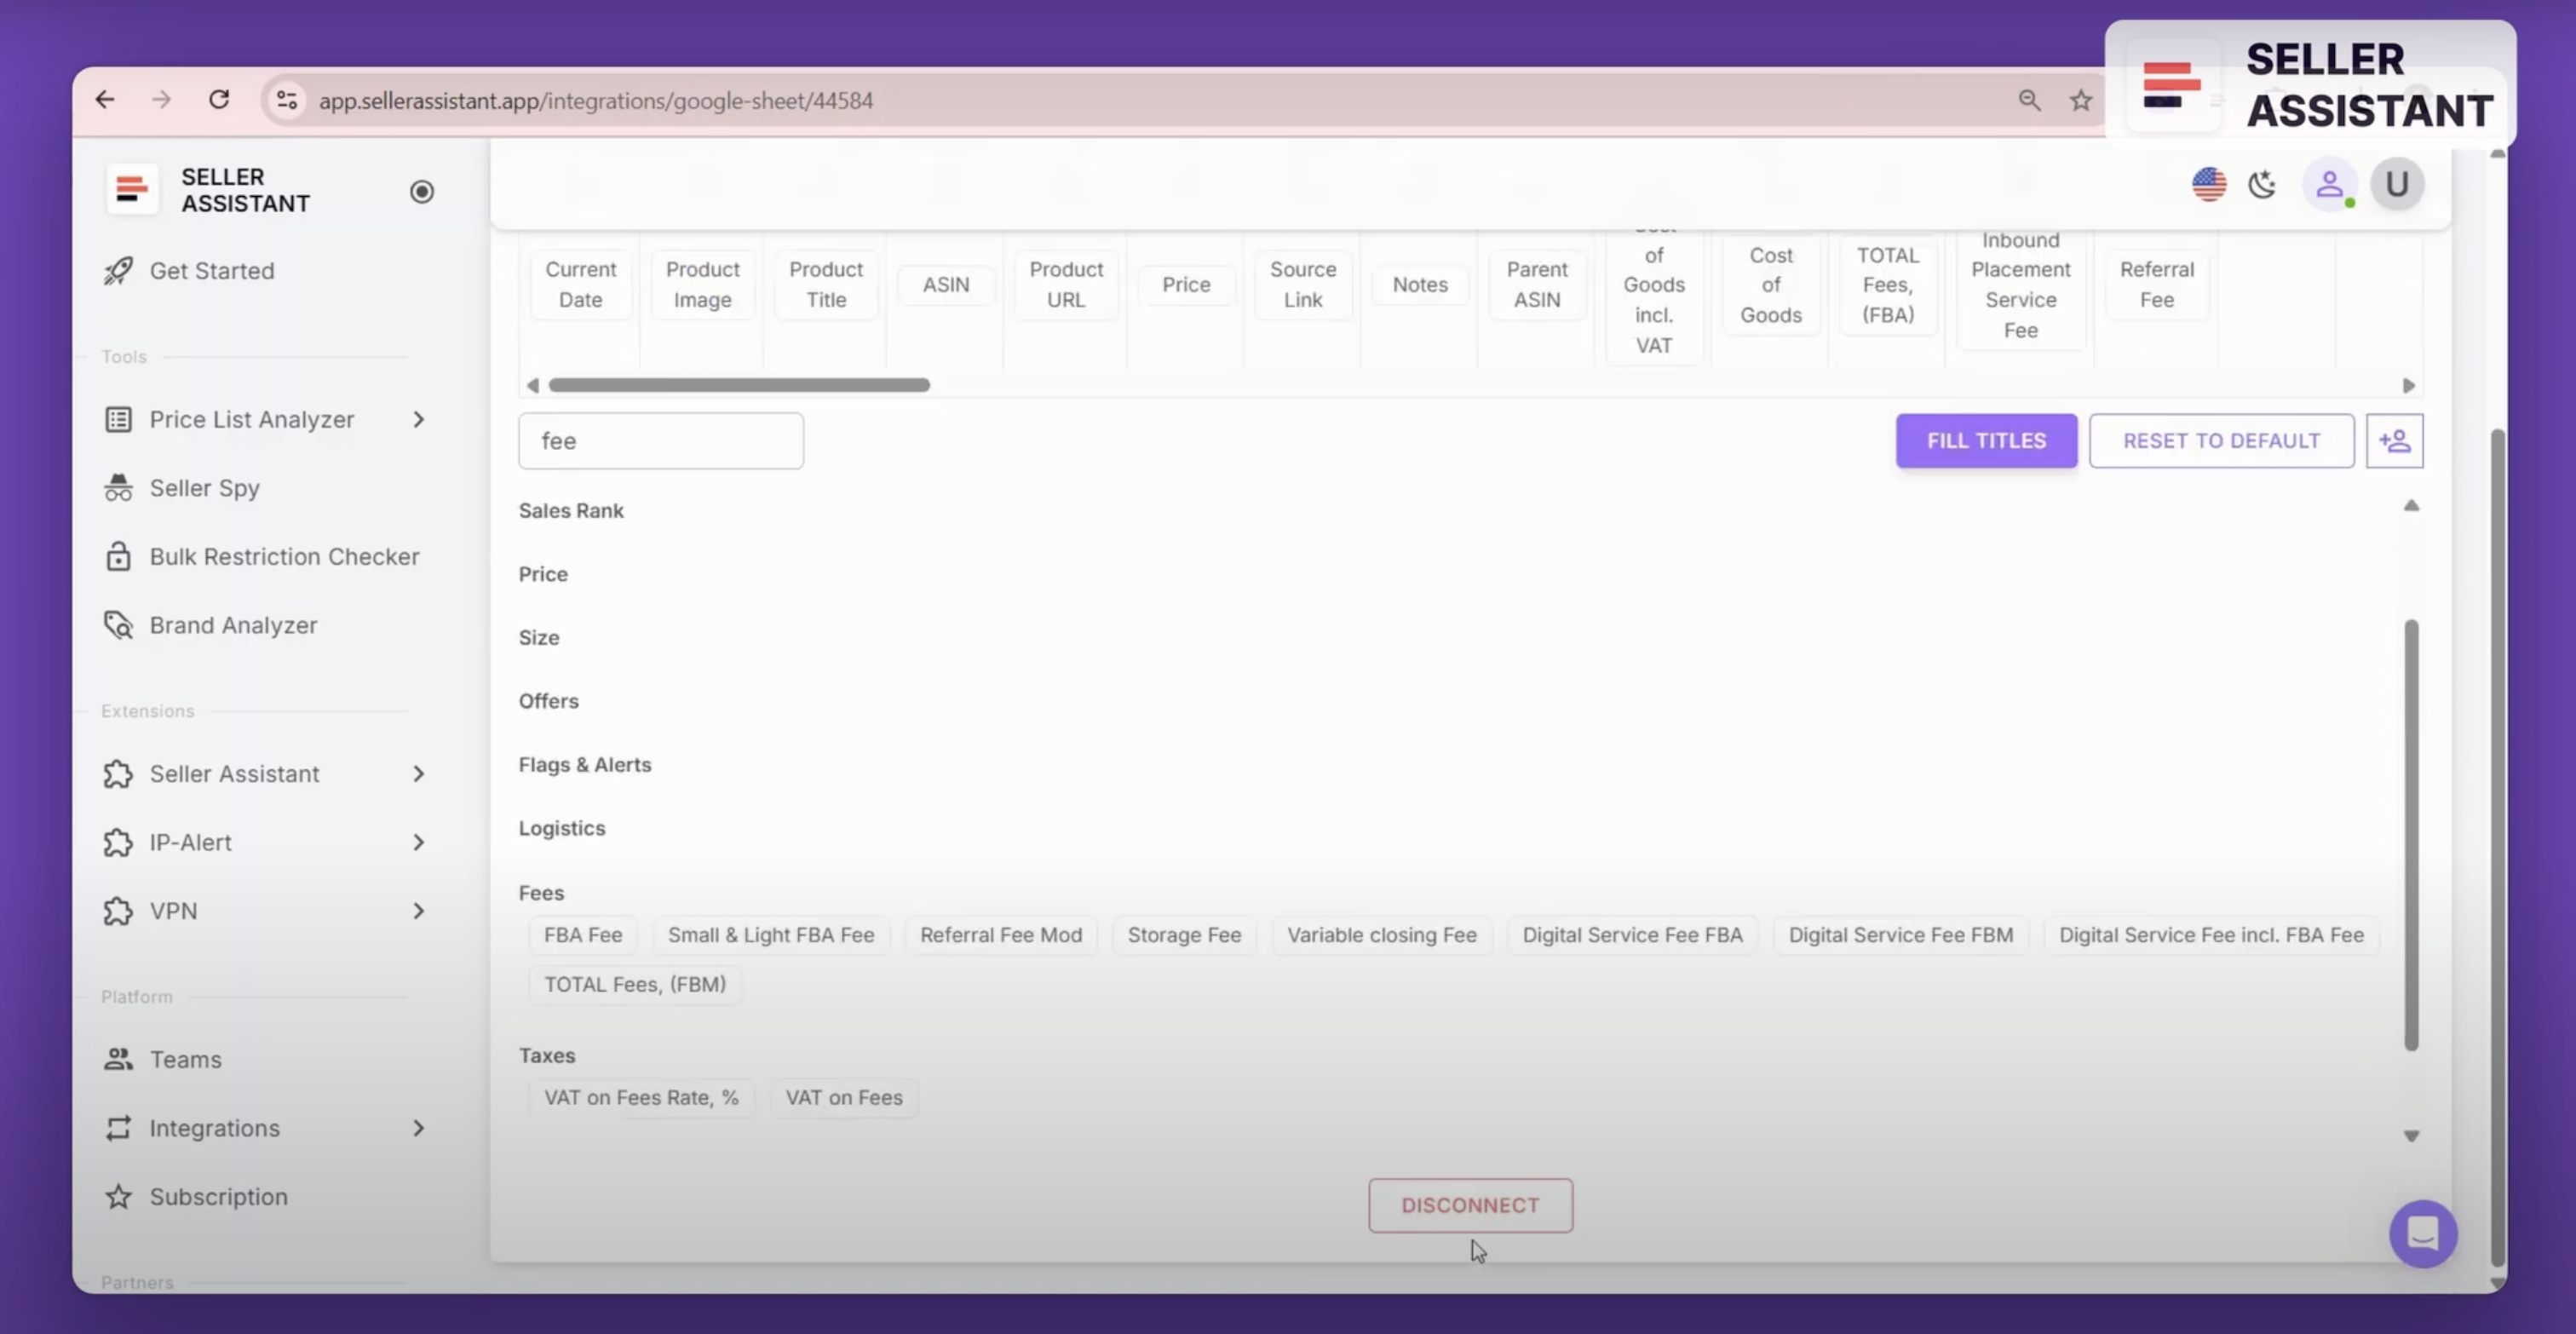
4. After you've added the selected variables, click the Fill Header button. This will automatically generate the header row in your Google Sheets spreadsheet.
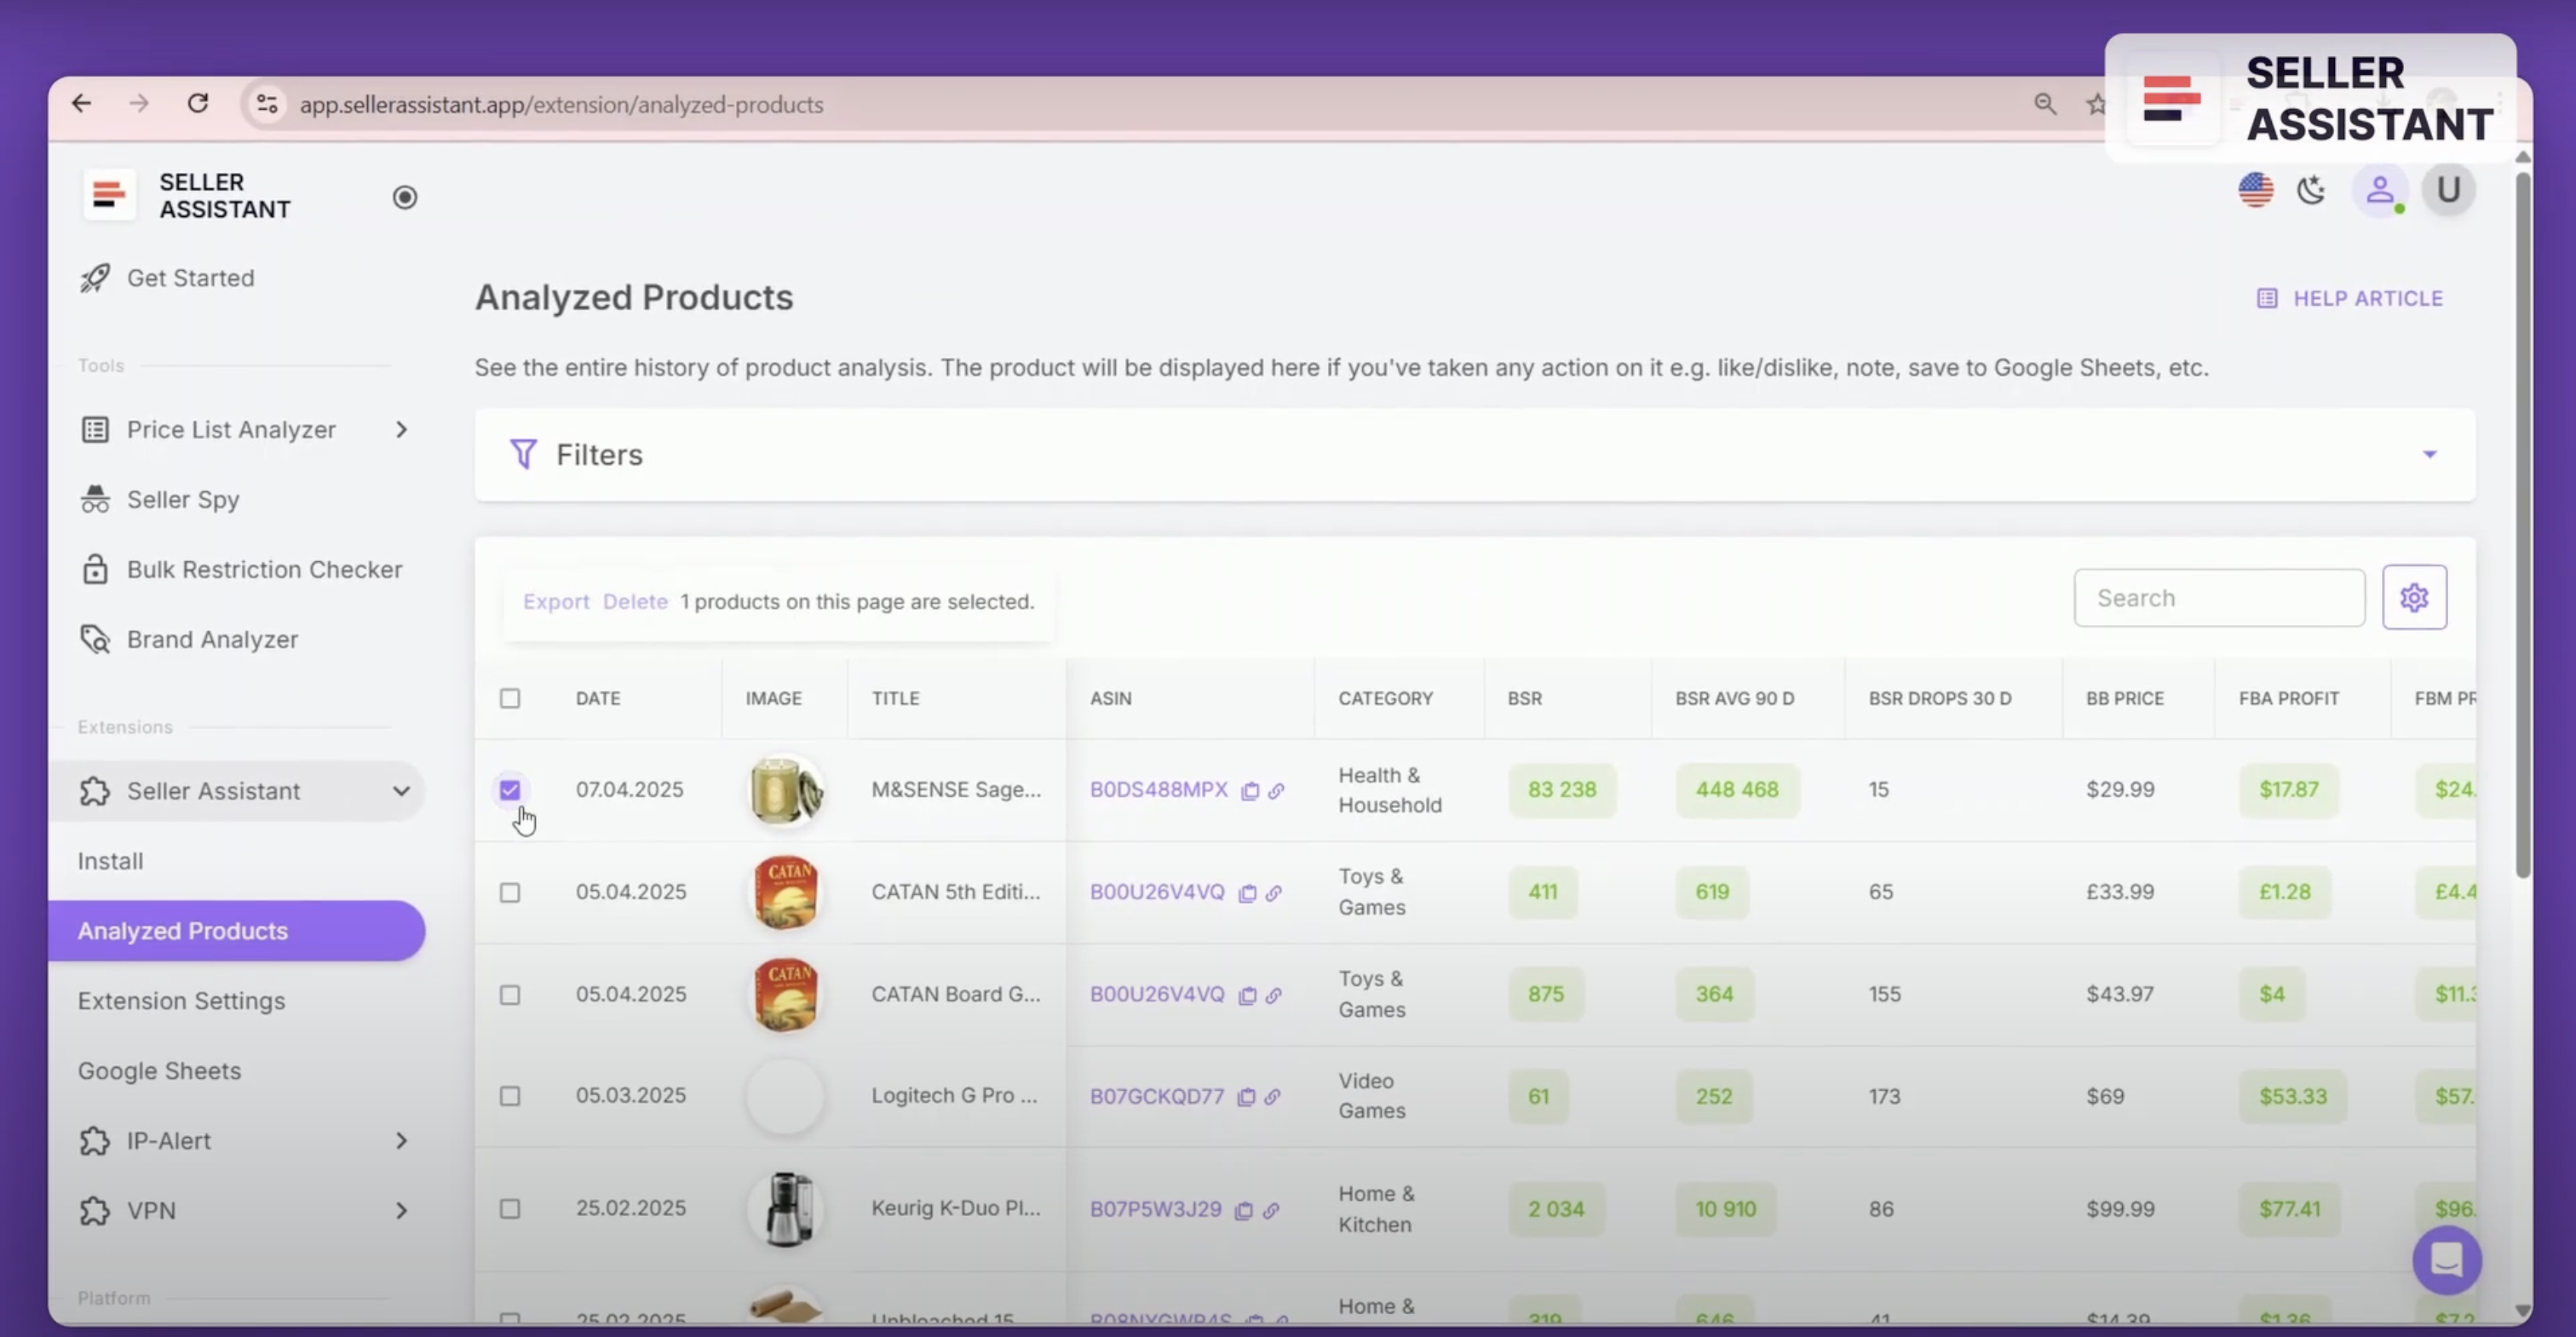
How to save data to Google Sheets?
Now when you’ve set up your export, you can save your data to Google Sheets. Follow these steps to save Amazon product information to Google Sheets.
- Open your product on the Amazon website.
- If needed, add a note to the product.
- Click the Save button to start the saving process.
- Choose your spreadsheet from the dropdown menu or connect a new sheet.
- Now you’ve successfully saved data to Google Sheets. Now you can access and manage it in one click.
That’s it for now.
In the next module, I will show how to research a product with Seller Assistant from A to Z.


